
New York Timelapse Filming Part 2
Categories: News
Sorry it’s been a while since the last post. Been quite busy and not got round to these timelapses for a while! But here we are, with New York Timelapse Filming Part 2…I’ve got a few to show you that went well…and a few which didn’t! I’m not going to pretend that everything comes out fine. The hyperlapse tests in particular were not a great piece of photography work. But, as promised, we’ll look at them all and see what went well and what most certainly didn’t!
So the first still we looked at was the One World Trade Centre timelapse. Here it is:

Time lapsing the sky over Manhatten (hopefully)
And here’s how the timelapse turned out:
As you can see, it was taken on a pretty dreary day. But that made for some quite decent clouds and a fair amount on contrast in the sky, once I’d dropped the highlights to rescue some of it. I used graduating filters to colour the water and bring out the sky more. The straight lines of the coast, and daunting clouds make the quite craggy nature of Manhattan seem pretty small, and just a neat slice of earth between the sea and vast sky. There are a few wobbles near the beginning which I still need to straighten out but pleased with the overall effect. Shame the clouds weren’t either spaced out, or bigger. In retrospect, a longer shutter speed (These ones were taken at 1.3) would have rolled the clouds more, but you can’t go back every day, so sometimes you got to work with what you’ve got!
The next picture was of Grand Central Station. Here’s the still:
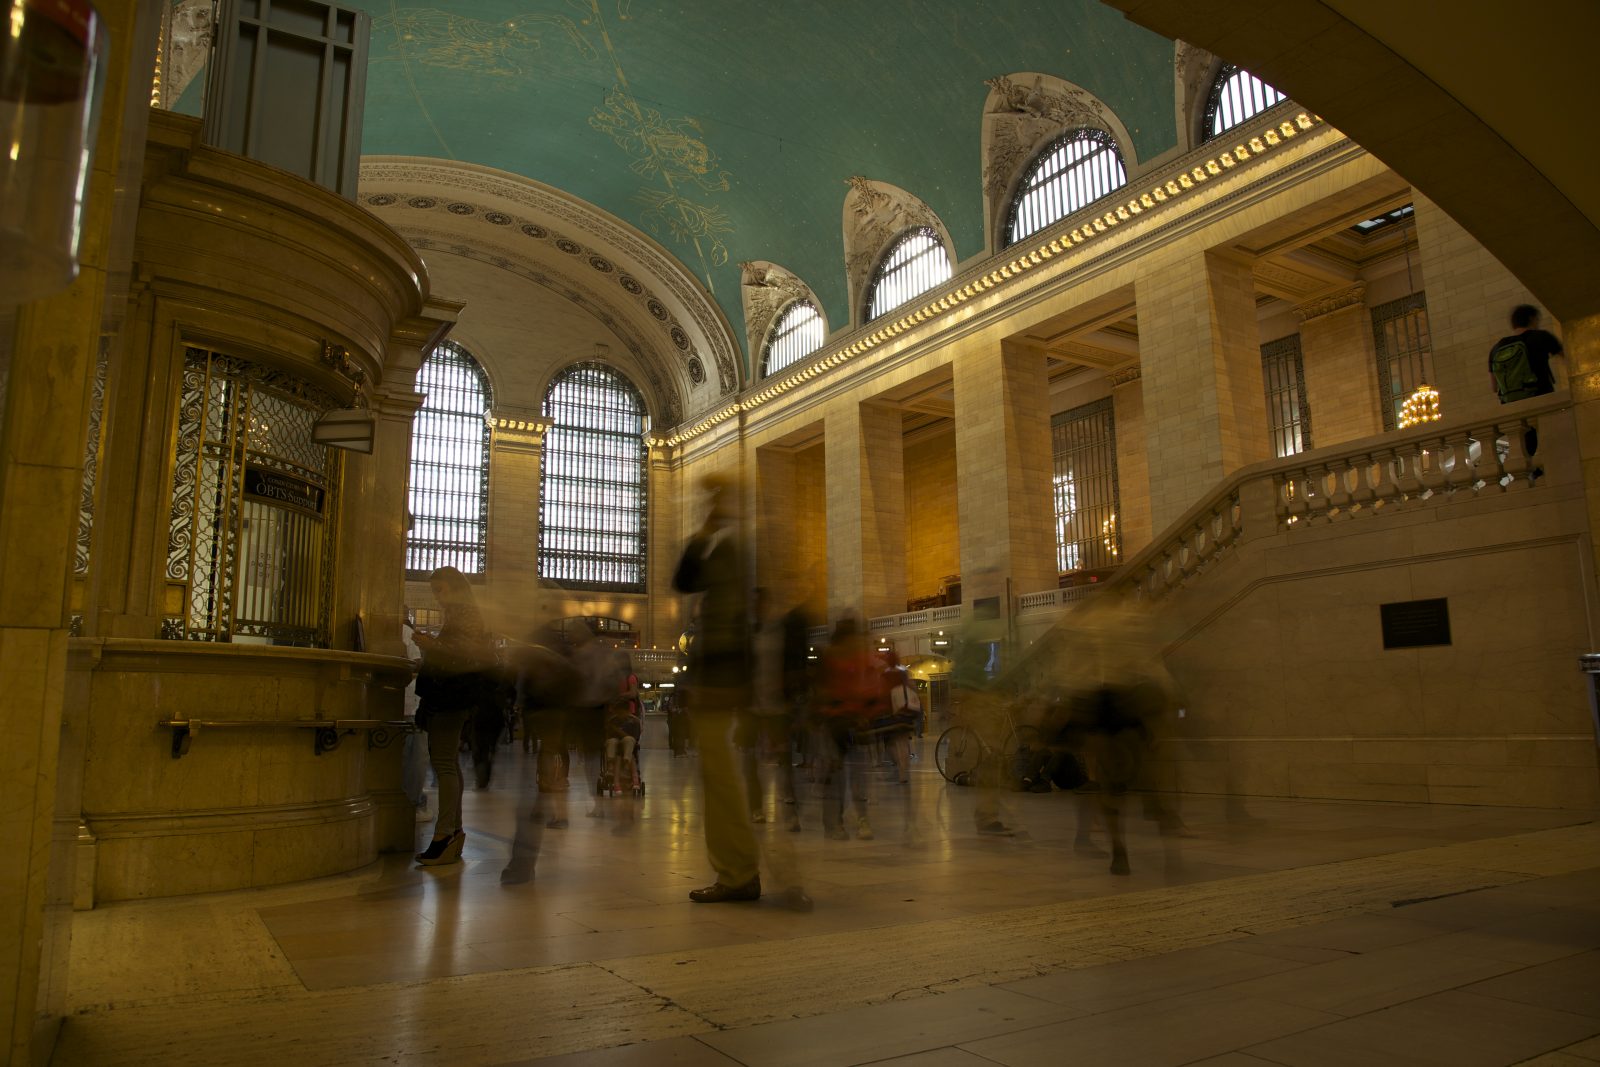
Raw image from timelapse
And here’s the timelapse:
As you can see, I’ve increased the exposure on this one and adjusted the WB to counter away the yellow overload. I also increased the exposure of the whole thing. The shutter speed (people’s movements being whispy) has worked pretty well (I think I was set on around 0.8 or 1 second, or there abouts). Again, probably could have played with that more, but we were under pressure not to be using tripods and, hidden in a corner there I was only just getting away with it, unlike my filming partner.
Next up! The hyperlapse test! Much as I’m embarrassed of this, I’m going to put it up anyway, as we all (hopefully) learn from our mistakes. These are truly a mistake, mind. Here is the still:

Taken from near the up-and-down horses!
And here is the disaster:
OK…so…it looks like a 13 yr old got a new computer with some craaaaazy effects he can put on his webcam which make the whole thing go wobbly. Yup, and that’s the result of the tiny bit of tracking and stabilisation I bothered to do to this once I saw the result. The WB adjustment and general colouring has gone pretty well. And I was happy with it after colouring the first still…….and then you realise just how bad a job I’d done of staying level (on, i guess, my x axis) with the camera when filming. That’s why you should always map out your path when hyperlapsing. UNLESS…you have a perfectly fine wooden line to follow…and then it becomes easier:
This one was filmed a few days later on the New York Highline. A fantastic, green hideaway in the middle of Manhattan. Again, it’s not perfect; it looks like an iPhone video done on an average selfie stick, but it’s getting there and that’s the important thing!
Moving on…the last two traffic timelapses esssentially. Both got really nice outcomes though which I was really happy with. Here’s the stills:

Taken from archway of the Brooklyn Bridge, looking back towards Manhatten.

New York 2014 shoot. Flatiron Building with traffic streaks.
You can read all about my ‘vision’ for these two in the previous blog. For now, here’s the first (Brooklyn Bridge) film:
This has turned out really well I think. It would have been superb if I’d have taken the slider. It’s an odd one because I’m not entirely sure what I should be highlighting! There’s so much. I’ve tried to bring out the city in the background, rescue the highlights and sharpen up the buildings and windows with a graduating filter (WB could be slightly less green on this area). But for me, the real star here is the strength, and majesty of the bridge. The steel girders, the rivets. Once again I use a thin graduating filter to bring out the vibrance, and really ramp up the clarity on the bridge. Shame the sky wasn’t doing more, but to be honest, that would have just been one more worry.
Here’s the final one:
I’m really pleased with this one. It’s kind of fitting and a nice coincidence that this one is last. The finale! The traffic blurs have come out just as I wanted, with cars and buses gliding through the traffic lights and across, and round the island on the bottom left of the frame. I used the clarity slider to brighten the buildings and contrast the sky in order to bring them more into the shot, making them look far more imposing – the angle this was taken at helps. I also love the traffic lights on this one, and the way the sky looks almost fake (Perhaps a little too much, but I couldn’t stop myself). On best quality versions you can see stars peeping through the clouds as they pass.
Well, let me know what you think. I’m always looking for opinion, and advice, so hit me up!
Take care,
Iain
No comments yet.